The DNSSEC feature for domains pointed to Custom nameservers allows to add and manage your DS records.
To add a record, you need to enable DNSSEC first (if it is not enabled).
Just log into your NityGity account, select Domain List on the left and click on the Manage button for the domain in question:
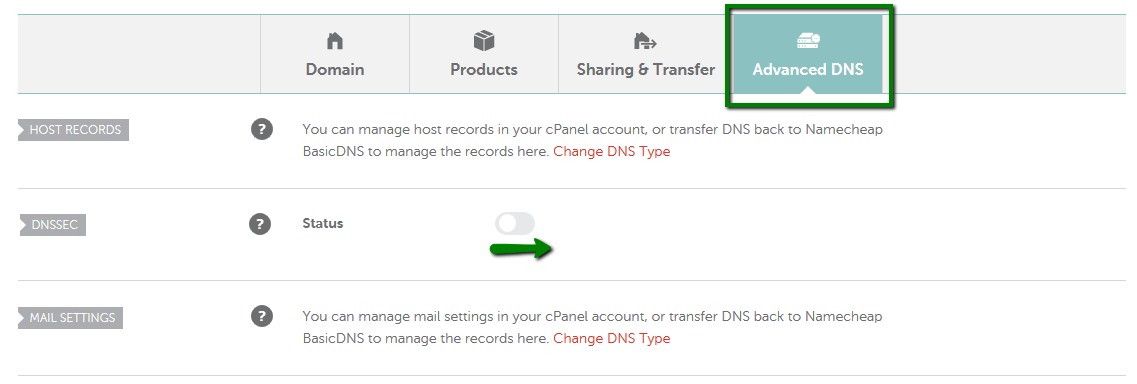
If you go to the Advanced DNS tab, you will be able to activate the service by toggling the corresponding button:
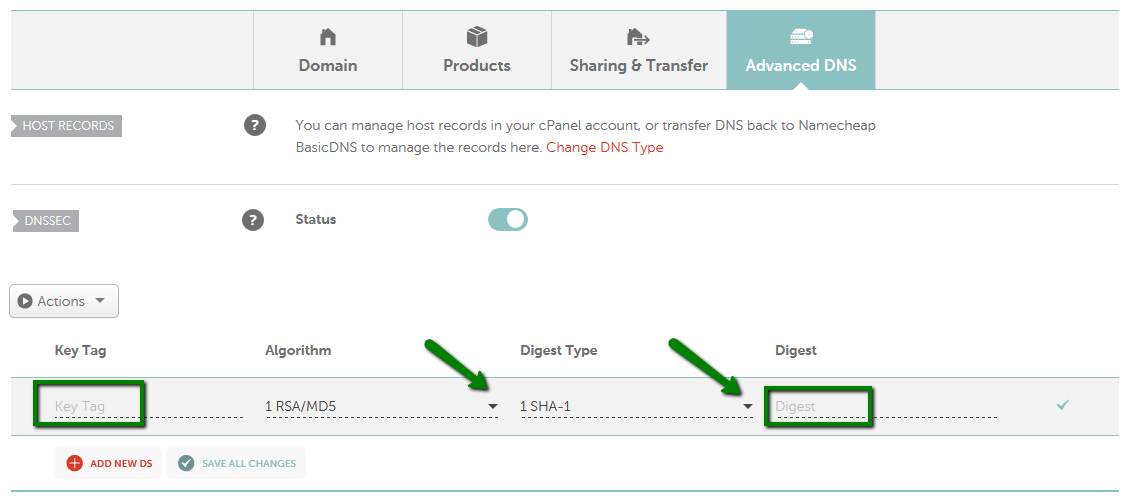
After that, the menu to manage your DS records will appear. To add a new record, fill in the corresponding fields with necessary information:
Each DS record consists of four fields: KeyTag, Algorithm, DigestType and Digest.
These values are received from the DNS/hosting provider that hosts your domain. If you are not sure where to get the records, please contact your hosting/DNS provider.
A DS record has the following format:
Where:
- Example.com. - domain name that the DS is for
- 3600 - TTL, the time that the record may remain in cache
- IN stands for internet
- 2371 - Key Tag, the key’s ID
- 13 - algorithm type. Each allowed algorithm in DNSSEC has a specified number. Algorithm 13 is ECDSA with a P-256 curve using SHA-256.
- 2 - Digest Type, or the hash function that was used to generate the digest from the public key
- The long string at the end is the Digest, or the hash of the public key
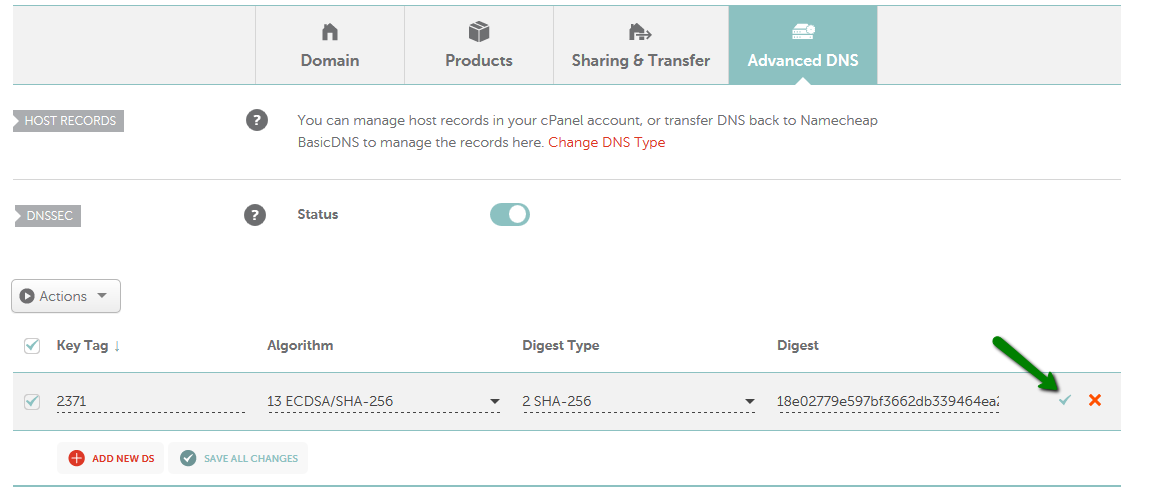
Once the needed records are added, save changes using the checkmark icon:

That’s it! Now please wait 60 minutes for the settings to take effect. You can check if the changes are accepted by analyzing your domain using VeriSign© Analyzer.
In order to disable the service, use the green toggle button as it is shown in the screenshot below:

If you decide to enable it again, the records you previously configured will be re-activated.
If you have any questions, feel free to contact our Support Team.