For shared/business packages, if a domain name is registered along with the hosting account order, the DNS will be changed to our hosting ones automatically.
If you wish to use PremiumDNS along with the hosting service, feel free to refer to this guide.If you’ve purchased hosting for an existing domain which is using NityGity BasicDNS, BackupDNS (a legacy option) or third-party DNS, you will need to change them to our hosting ones manually following the steps below:
1. Sign into your NityGity account (The Sign In option is available in the top hat of the page).
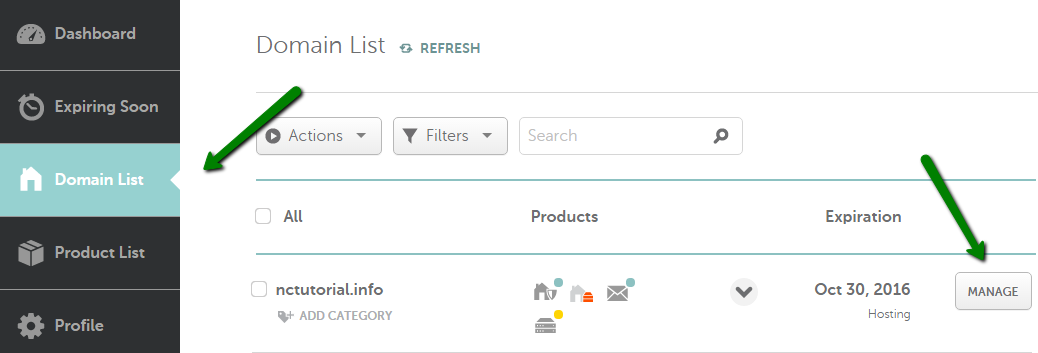
2. Select Domain List from the left sidebar and click on the Manage button next to your domain:

3. Find the Nameservers section and choose NityGity Web Hosting DNS from the drop-down menu in order to point your domain to our shared hosting nameservers:
dns1.nitygityhosting.com
dns2.nitygityhosting.com
NOTE: Once the nameservers are changed, all the custom DNS records for your domain will be overwritten to our hosting ones. You will be able to re-create them in your cPanel Advanced DNS Editor and MX Entry menu where you can manage domain's email settings.
Make sure that you hit
NOTE: Reseller, VPS and dedicated server hosting customers should change the DNS settings according to their hosting welcome emails instead of using the described procedure.
Once the nameservers are changed, these changes are not accepted instantly all over the world. It may take up to 24 hours (more, in rare cases) for local ISPs to update their DNS caches so that everyone can see your website, check this article for more details.
That's it!
If you have any questions, feel free to contact our Support Team.