It is possible to use our hosting services with a domain pointed to NityGity BasicDNS. In case your domain is currently pointed to NityGity Web hosting DNS use this guide to change the nameservers.
NOTE: When switching between NityGity BasicDNS/PremiumDNS/Web Hosting DNS nameservers, the DNS changes come into the effect within one hour (24+ hours in rare cases).
After the change it is necessary to copy all DNS and email MX records from hosting account (cPanel) to NityGity account Advanced DNS tab.
To copy DNS records follow these instructions:
Find the hosting records to be copied:
1. Log into your cPanel
2. Navigate to the Domains section > Advanced Zone Editor menu: 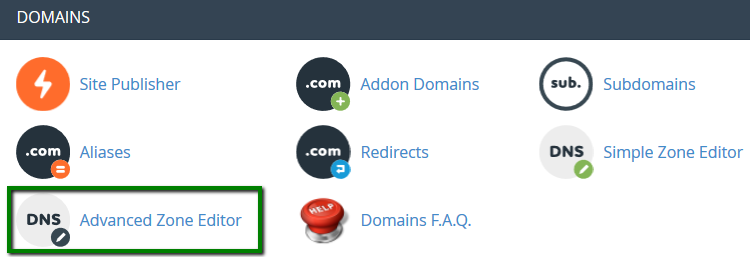
3. Choose the domain you would like to edit from the drop-down menu: 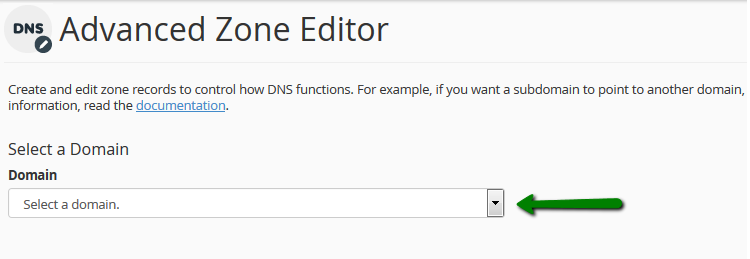
We are using a test domain nctest.info to show you how it works. Please select your own domain from the list and make adjustments depending on the domain selected.
4. You will see the list of the DNS zone records: 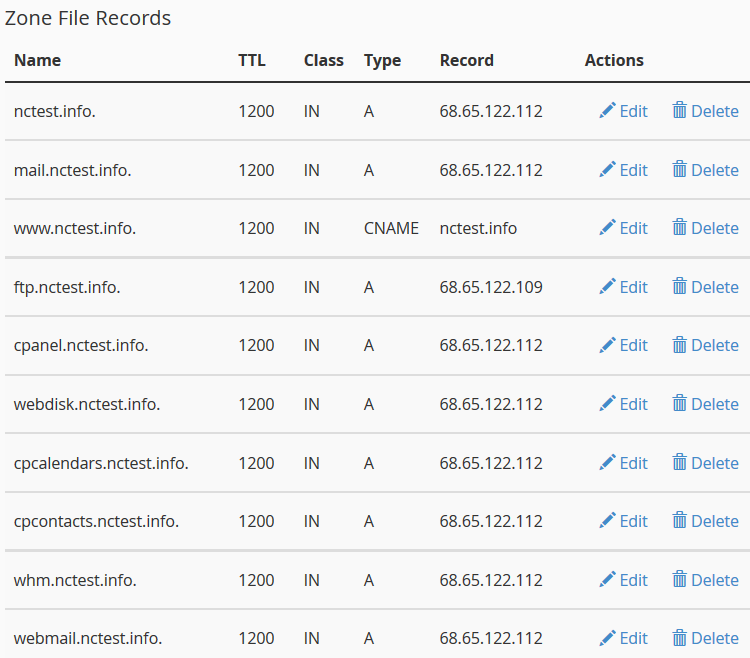
Add the DNS records to the NityGity account:
1. In a separate tab sign into your NityGity account
2. Select Domain List from the left sidebar and click on Manage next to your domain: 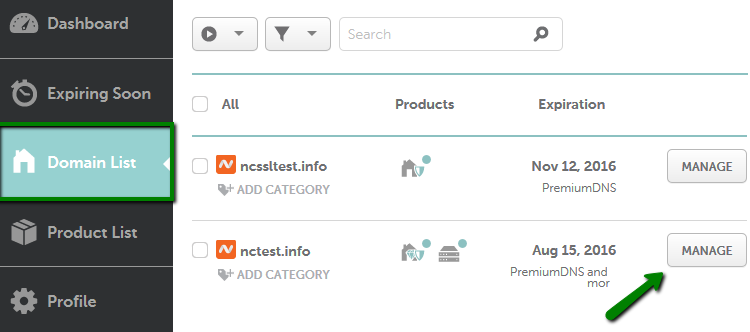
3. Switch to Advanced DNS tab at the top of the page: 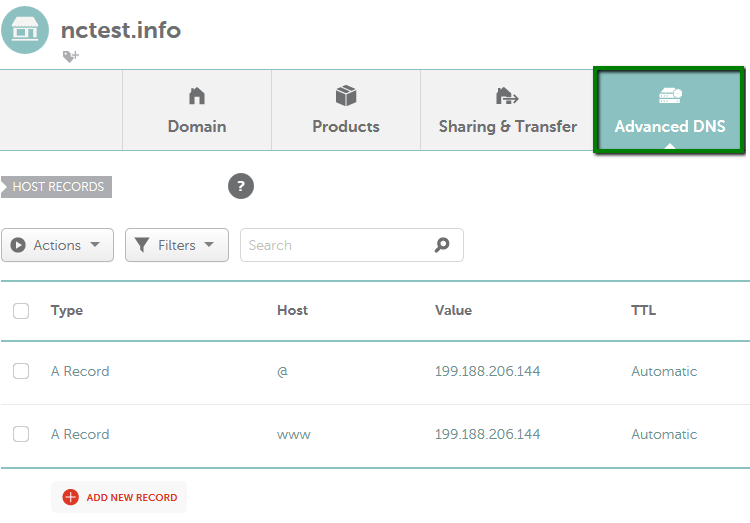
4. Find the Host records section and click on the Add New Record button
5. Create the same records as shown in your cPanel: 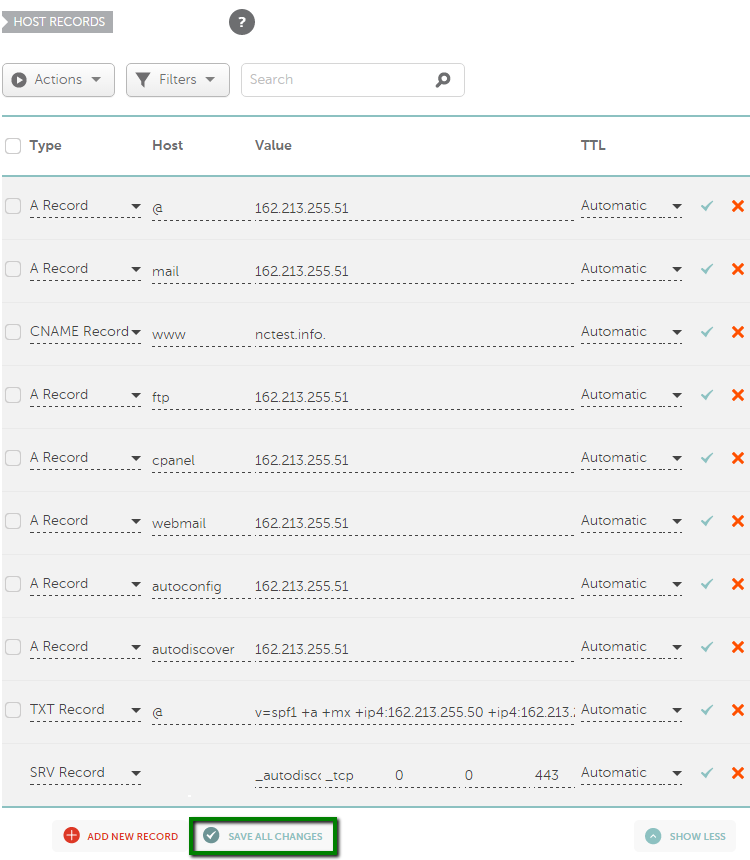
NOTE 1: use only the name of the subdomain in the 'Host' field in NityGity account. For example, to set A record for mail.nctest.info use 'mail' for the 'Host' field.
NOTE 2: you will need to copy all the future records in the same way.
In order to copy email MX records follow these instructions:
Find the MX records to be copied:
1. Go to cPanel > Email section > MX Entry menu: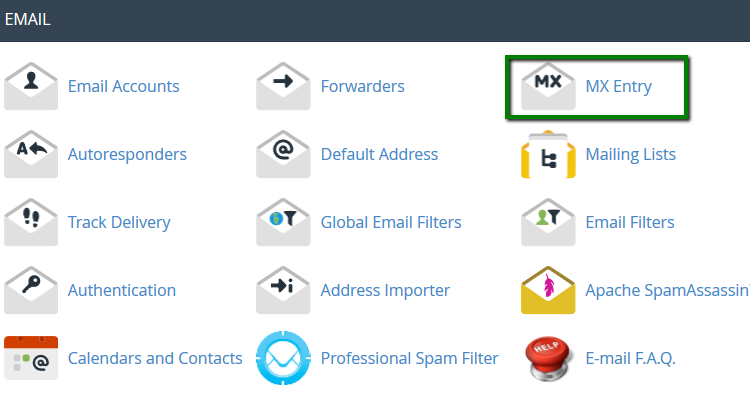
2. Choose your domain from the drop-down menu: 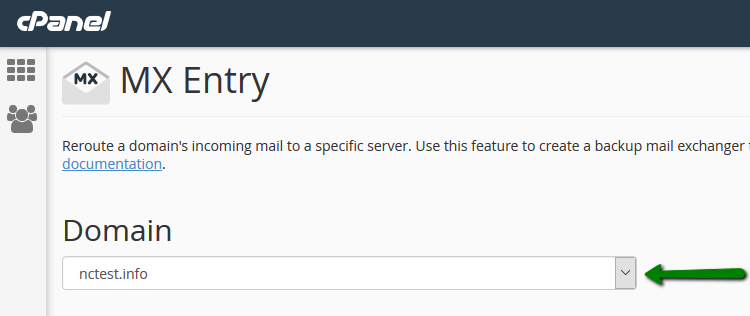
You will see the list of MX records: 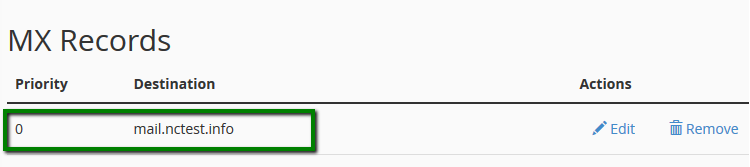
Add MX records to the NityGity account:
1. Go back to Advanced DNS tab in NityGity account.
2. Scroll down to the Mail Settings section and select Custom MX from the drop-down menu: 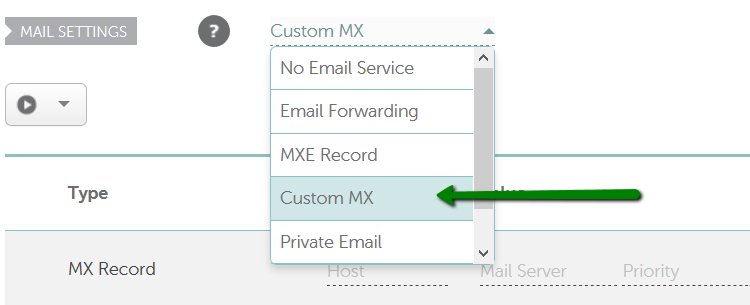
3. Copy the MX records from cPanel and click on Save All Changes button: 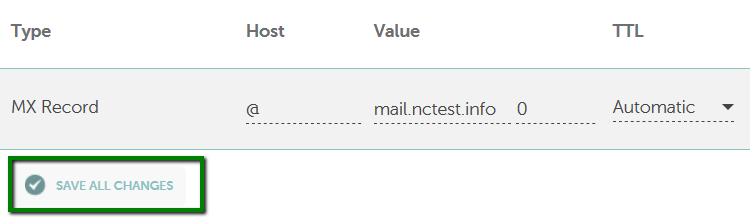
NOTE: In case you are using mail.domain.com as MX record make sure you copy A record for mail subdomain to NityGity account.
That's it!
Need any help? Contact our HelpDesk