If you have decided to transfer your hosting account from Bluehost to NityGity, we will gladly do this for you completely free of charge.The process is absolutely hassle-free.
You will just need to submit a transfer request to us, and we will email you once it is done.
Before submitting, make sure the following conditions are met:
1. You acquired a hosting account with us, and it is active.
2. Your Bluehost hosting has approximately 3 more days left until the expiration date.
3. You are ready to provide us with the Bluehost cPanel access details.
In order for us to start the migration, submit a ticket to Hosting - Transfer Assistance department.
If you’d like to complete a manual hosting transfer from Bluehost to NityGity, follow this step-by-step guide:
1. First, you need to create a backup of your Bluehost hosting account.
For this, log into your cPanel account with them, go to the section Files > Backup Wizard: 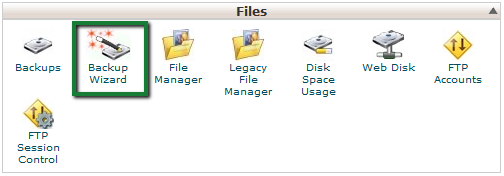
2. In the next window select Backup > Full Backup: 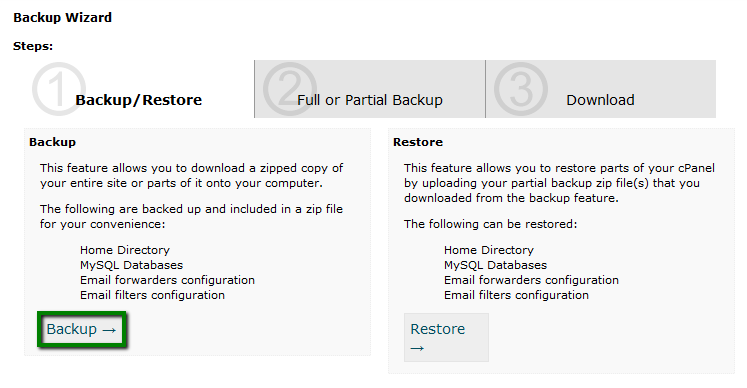
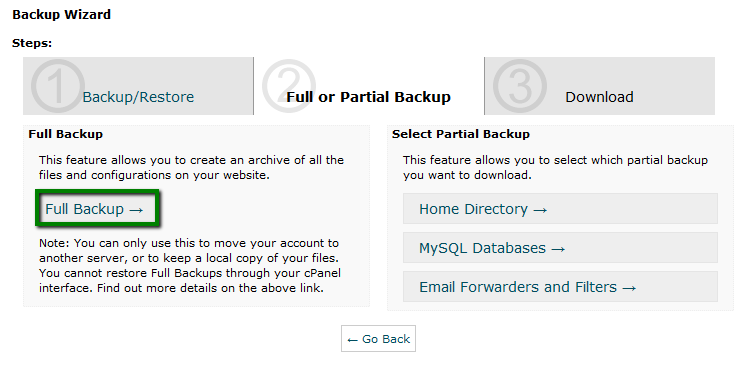
3. Choose Home Directory for the backup destination, enter your contact email address and hit Generate Backup: 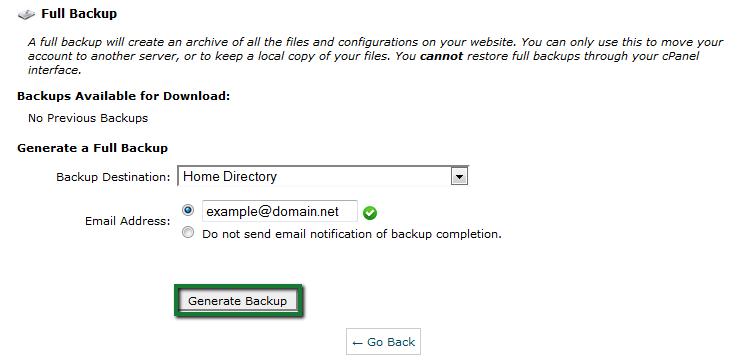
4. Once it’s ready, you’ll receive an email notification with a green success checkmark icon next to the name: 
5. Now you need to download the created backup.
To do this, go to cPanel > Files section > File Manager menu: 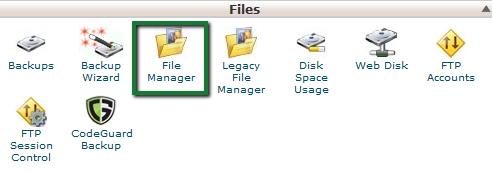
6. Select Home Directory and hit Go: 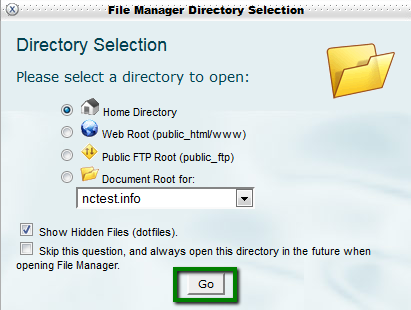
7. Select the backup from the list and click Download: 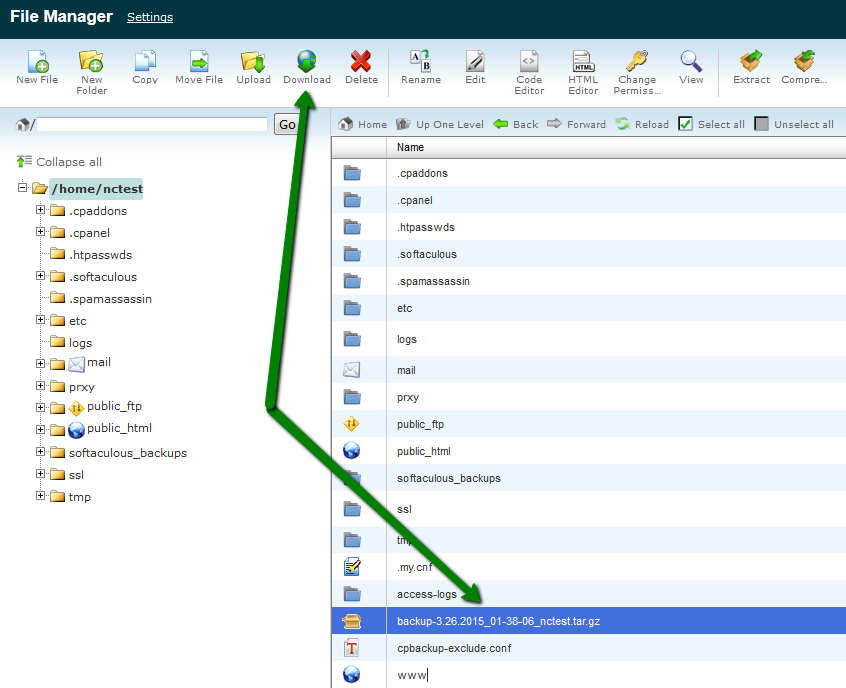
8. Now when you have it on your computer, you can proceed with the backup upload to your new hosting account.
Log into your cPanel account with us, go to the Files section > File Manager menu.
All login details are provided in the Hosting Welcome Guide email.
If you cannot locate it, initiate a Live Chat session and we will gladly resend it to you: 
9. Select Home Directory and hit Go: 
10. Once in, click on Upload in the bar above to proceed: 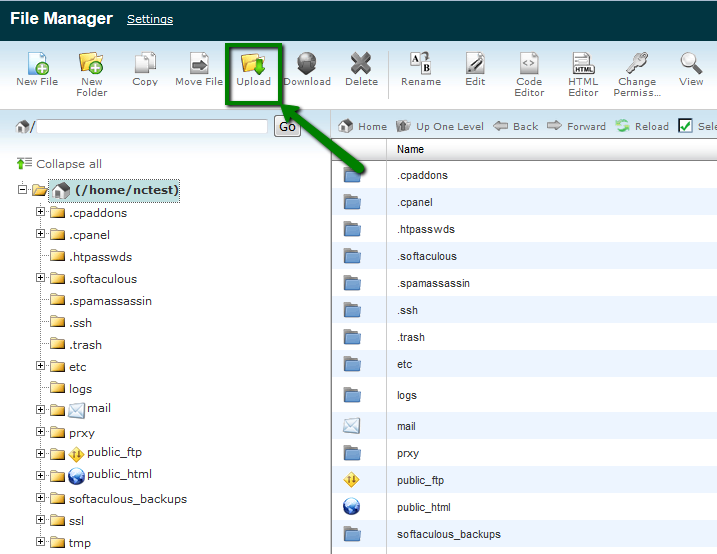
Once the backup has been uploaded to your hosting account with us, submit a ticket to Hosting - Support department and we will restore it for you.
That's it!
Need any help? Contact our HelpDesk