This article gives an overview of WordPress Multisite, describes how it works, its advantages and provides installation guidelines:
for cPanel paper_lantern theme
for cPanel x3 theme
for cPanel paper_lantern theme:
1. What is WordPress Multisite (WPMU)
2. Pros and cons of WPMU
3. Installing WPMU
4. Turning regular WordPress installation into WPMU
5. Creating subdomains and subfolders
6. Connecting another domain to WPMU site
1. What is WordPress Multisite (WPMU)
WordPress Multisite (or Wordpress MultiUser/WPMU) is a WordPress feature that allows you to run multiple WordPress sites from within one WordPress installation.
All these installations make up a so-called 'network'. All the sites in this network share one database, however, they have separate tables within this database and different directories for media uploads. Also, these sites share the same plugins and themes.
The Network Admin is the only one that can manage plugins and themes for all the sites from one single Admin Dashboard.
2. Pros and cons of WPMU
WordPress Multisite has its advantages and disadvantages.
The pros of WPMU:
- Ability to manage multiple WordPress blogs from one dashboard.
- One-click installation of WordPress blogs inside the network (you just need to enter the blog name and Admin email address).
- It is possible to have multiple sites/blogs for the same admin/user that will be able to manage these sites from the same dashboard.
- Super Admin has access to all the blogs and can manage them.
- You need to update WordPress, a plugin or theme version only once for all the sites within the network.
- For a Super Admin, it is possible to manage privacy settings and decide what options or features the users will have access to.
The cons of WPMU:
- The Super Admin should have some experience in managing WordPress blogs and should know how to edit WordPress core files on the server.
- Some themes and plugins designed for a regular WordPress website may not work so well for WMPU, so it might be necessary to find alternatives.
- If the main installation is affected or hacked, then all the blogs in the network will be affected/hacked too.
3. Installing WPMU
WPMU may be easily installed via Softaculous Apps Installerin cPanel:
1. Go to your cPanel and find Exclusive for NityGity customers section: 
2. Find WordPress and its icon to install: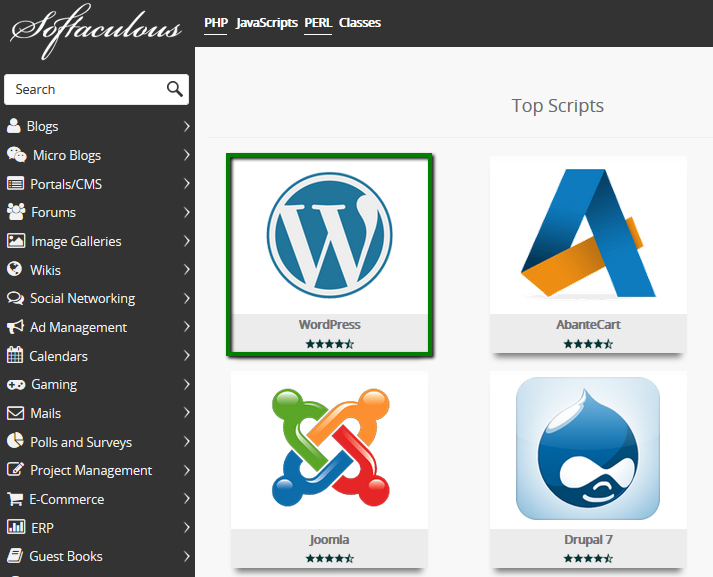
3. Fill out the details for your website, scroll down and click Install.
NOTE: The corresponding option Enable Multisite (WPMU) should be checked during the installation. 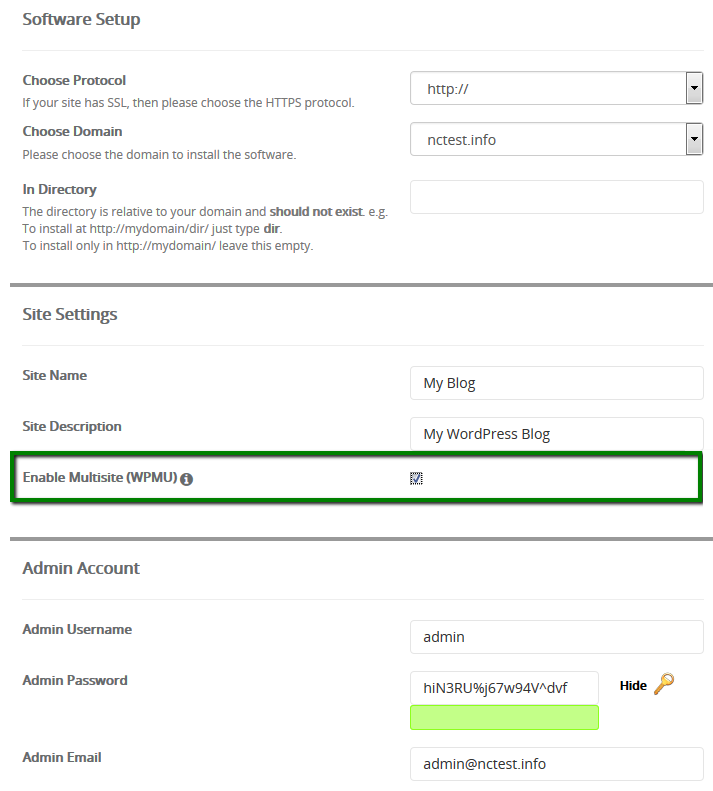
4. You will get a notification that WPMU is successfully installed for your domain. This is the easiest way to install WPMU for your domain.
How can you check if WPMU is already enabled for your site?
You need to find the wp-config.php file. There you will see the following lines that state WPMU is enabled:
/* Multisite */
define( 'WP_ALLOW_MULTISITE', true );
define('MULTISITE', true);
define('SUBDOMAIN_INSTALL', false);
define('DOMAIN_CURRENT_SITE', 'yourdomain.com');
define('PATH_CURRENT_SITE', '/');
define('SITE_ID_CURRENT_SITE', 1);
define('BLOG_ID_CURRENT_SITE', 1);
4. Turning a regular WordPress installation into WPMU
If you have a regular WordPress installation but decided to make Multisite, there is no need to re-install or remove your WordPress. You may as well enable Multisite for it following the instructions below.
We recommend you to back up the WordPress website before you start in case some steps are followed improperly.
You may begin with the wp-config.php file editing. It is possible to do it via FTP or directly in cPanel.
1. Go to your cPanel > File manager > public_html folder (or the subfolder where WordPress files are located) > choose the wp-config.php file and click Edit: 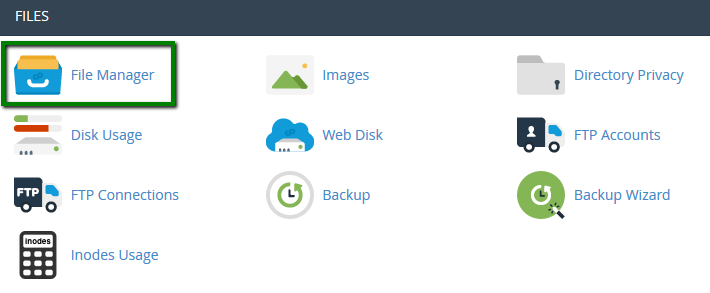
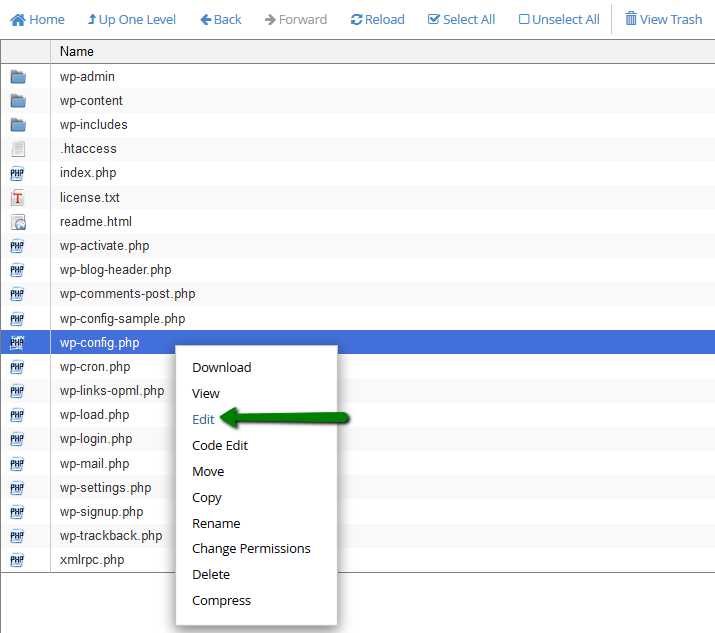
You need to add the following line in the same place as shown in the screenshot:
define('WP_ALLOW_MULTISITE', true); 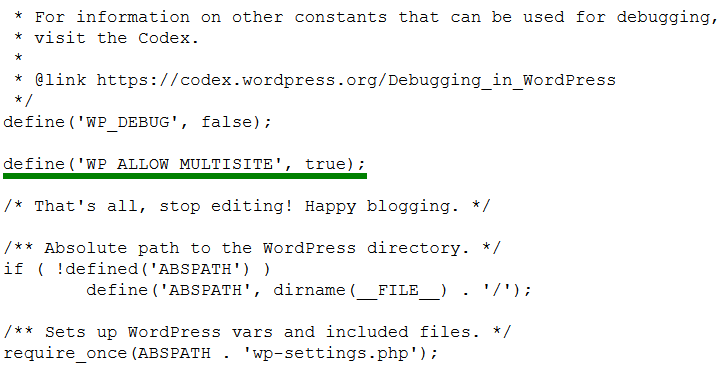
Once done, save the changes.
2. Log in to your Admin Dashboard and check that Network Setup has been added to your Tools menu: 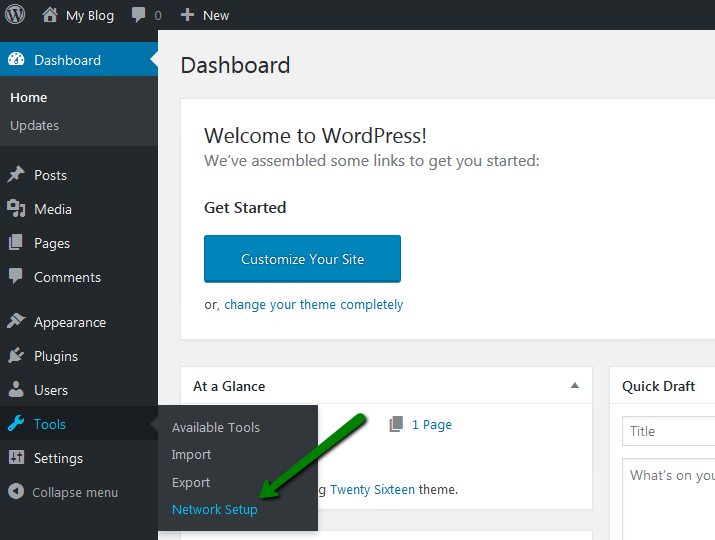
You will see the following: 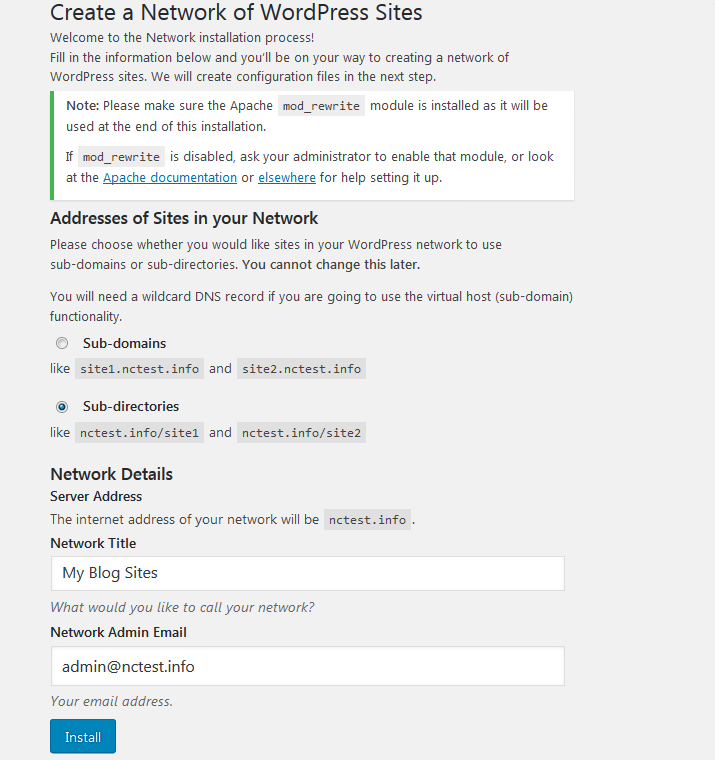
NOTE: Make sure the Apache mod_rewrite module is installed as it will be used at the end of this installation. If mod_rewrite is disabled, ask your administrator to enable that module or check the Apache documentation or elsewhere to set it up.
The mod_rewrite module is enabled by default on our servers, so you may disregard this notification.
3. You need to choose whether you would like your sites to use a subdomain or sub-directories in your WordPress.
The Sub-domains option will get your sites URLs as site1.yourdomain.com, site2.yourdomain.com, etc.
NOTE: You will need to set up a wildcard subdomain first in order to use subdomains. You may find the corresponding tutorial on the wildcard subdomain setup here.
The Sub-directories option will enable you to have sites URLs like yourdomain.com/site1, yourdomain.com/site2, etc. This option doesn't require any additional adjustments.
It is not possible to have both options enabled at the same time. Once you have chosen which is best for you, proceed and click Install.
4. Next, you will see the page called Create a Network of WordPress sites. Enabling network.
In order to complete enabling Multisite, wp-config.php and .htaccess files are to be modified. For this, follow the steps as described on the page (make sure you copy-paste code abstracts precisely):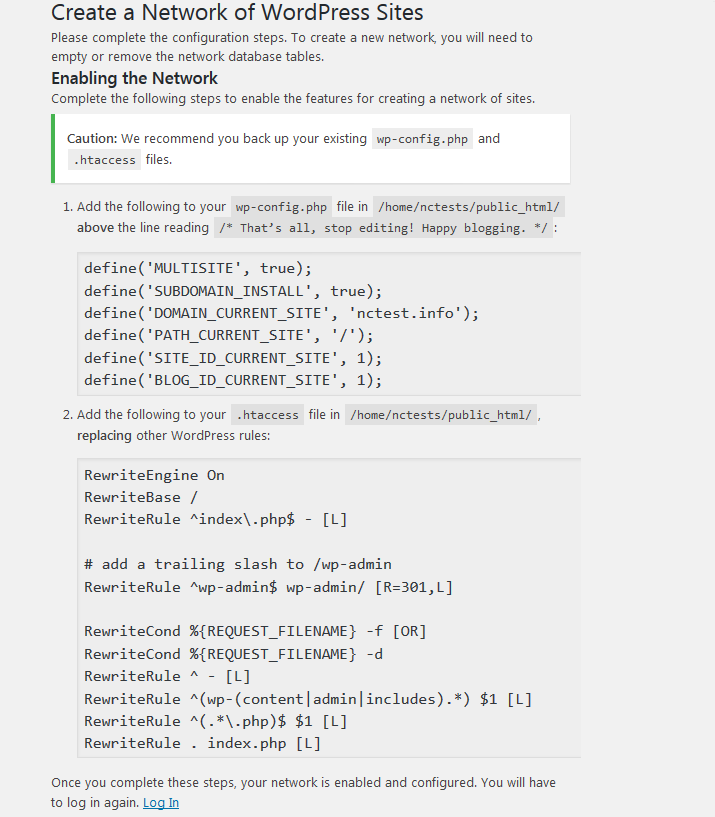
Once both files are edited, your network is enabled and configured. Click on Log In and re-access your WordPress admin dashboard using the same login details.
5. The last step is creation of a mu-plugins folder with the plugins activated by default and affecting all the sites in the WPMU installation.
Navigate to File Manager menu and locate the root folder for your WordPress installation. Move to wp-content folder > click the New folder button in the top menu > type mu-plugins in the corresponding field > click Create a New Folder. Ensure the permissions for the newly created folder are set to 0755: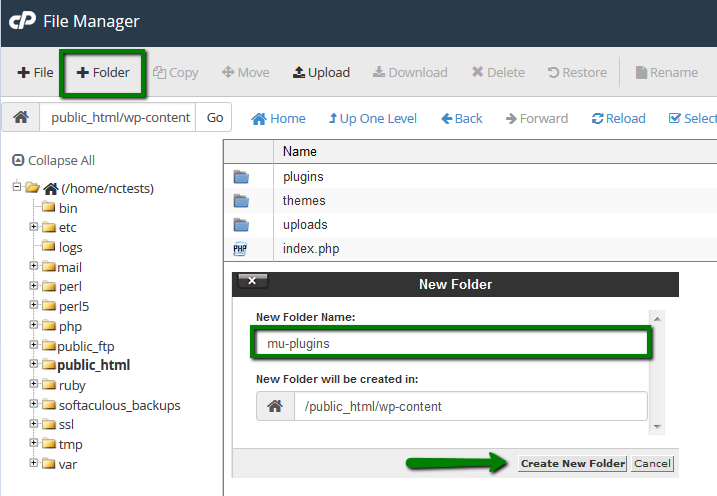
6. Now you can log into your Admin Dashboard again and check if the network is enabled:
Network Admin is a super admin that has access to the whole Network Management and all other WordPress dashboards.
5. Creating subdomains and subfolders
You will need to created new sites in the WordPress Network via Network Admin.
1. Go to your WordPress admin panel > My Sites > Network Admin > Sites: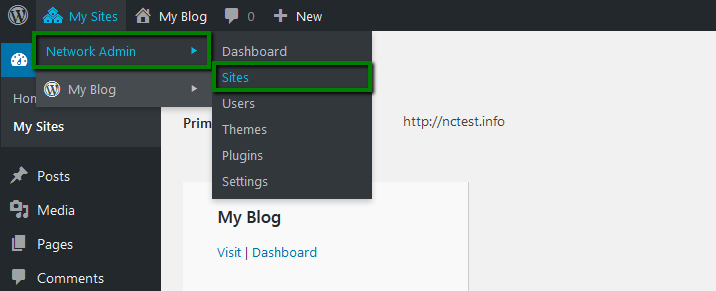
2. Click Add New to create a new site: 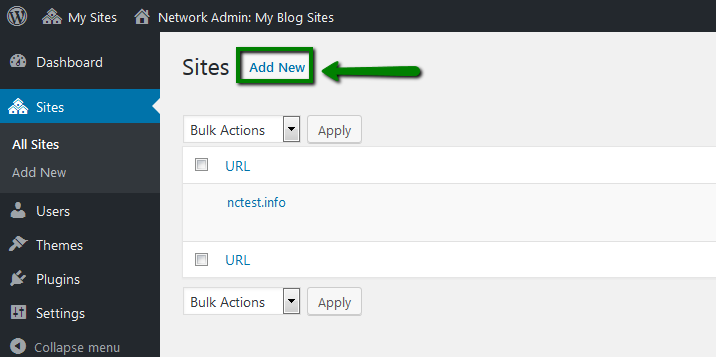
NOTE 1: If you have installed WPMU via Softaculous, you will have the subdirectory option (yourdomain.com/site1) set up by default, so it will be possible to add new WordPress site to the sub-directory as described below.
NOTE 2: The admin email field – if you use the email address already assigned to Super Admin or Admin of the regular WordPress installations inside the network, you will need to access the Admin Dashboard for the new site with the same details.
If you use the new email address, which is not assigned to any user yet and does not exist in the WordPress database, the new user will be created, and the login details will be sent to the specified email address: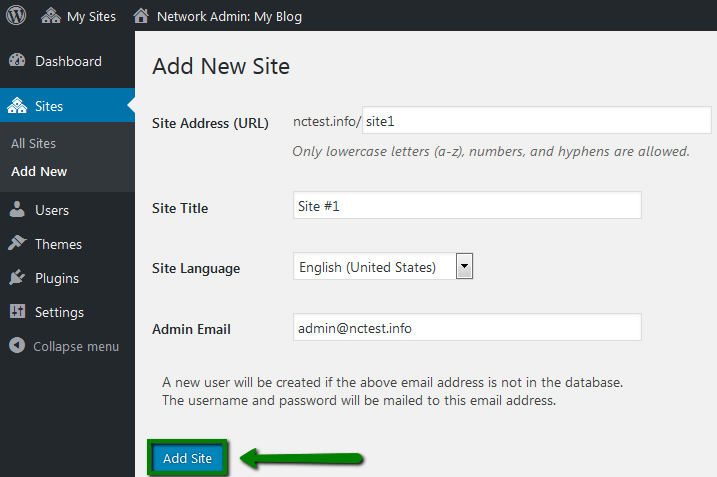
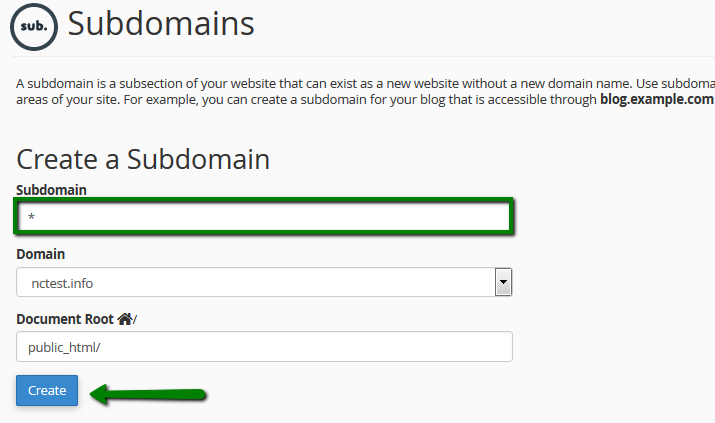
If you would like to install WordPress site to the subdomain, not to the subdirectory, you need to do the following first:
1. Create a wildcard subdomain in Subdomains menu in cPanel: 
2. Change Subdomain_Install option in the wp-config.php file from false to true and save the changes: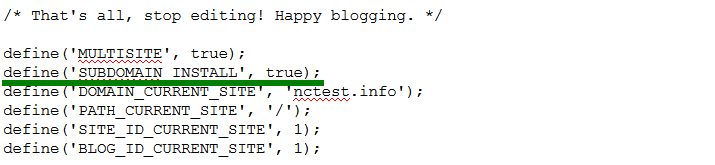
3. Once done, you can access Network Admin Dashboard and install WordPress to the subdomain: 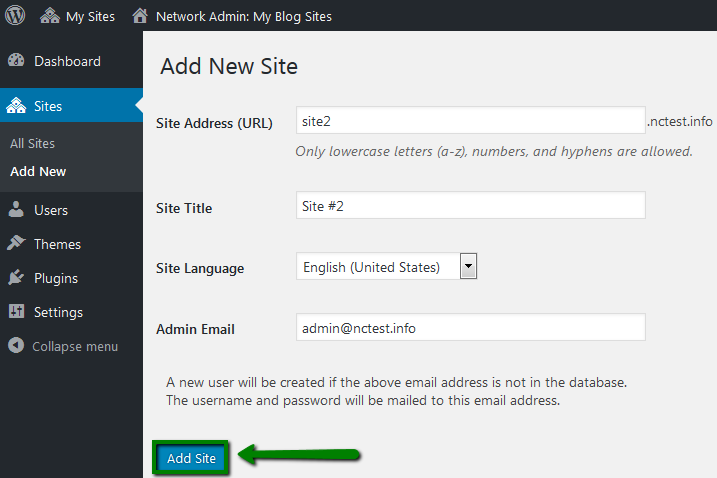
If you switch the Subdomain_Install option back to false, it will be possible to create the subdirectories again.
As a result, you can switch from subdomains to subdirectories depending on the needs.
6. Connecting another domain to WPMU site
NOTE: The domains you want to connect need to be added as parked ones or addons pointed to the root folder of the main domain.
To change the WPMU site URL:
1. In Network Admin dashboard, go to Sites > All Sites and click Edit under the site you wish to change: 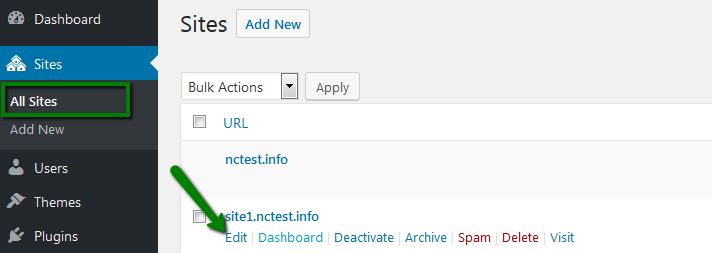
2. Change the Site Address (URL) to your domain's URL and click Save Changes: 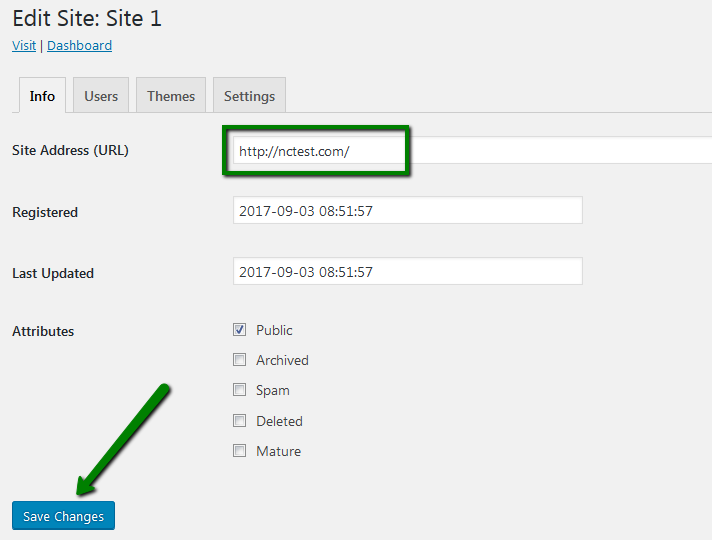
Your domain will show the content of the WPMU site now.
That's it!
Need any help? Contact our HelpDesk