Let`s start with what cache actually is and what it does. Usually, cache is just generated copies of your web content that are created in order to speed up the process of resolving a particular web page for the end user.
CloudFlare makes websites faster in part by taking the static content (like CSS, Javascript, or existing images) of your site and moving it closer to the visitors, so you can run a dynamic, database-driven site, and it will behave as you expect.
However, sometimes you may wonder why some updated content is not showing up on your home page or not updating. This means you are viewing an old copy of the file, and the cache is not refreshed yet.
Cache purge deletes the cached content of your webpages, forcing CloudFlare to make expire all static resources cached prior to the button click and fetch a new version of your website.
NOTE: Purging cache will only delete the cached copies of the files, not the files themselves.
In order to purge cache using CloudFlare you need to log into the CloudFlare account and choose the Caching menu: 
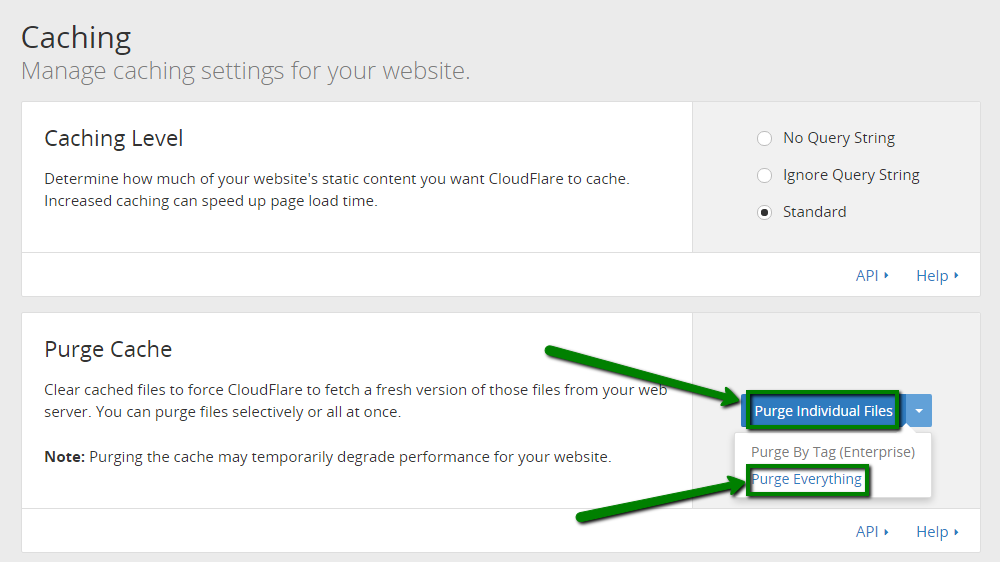
Then you will be redirected to the Caching settings page. Find the Purge cache option: Here you may either purge cache for individual pages or items or purge it all: 
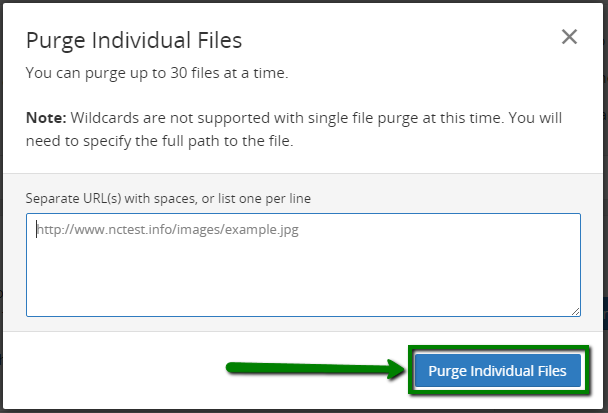
If you choose the Purge Individual Files option, you will be redirected to the next screen where you will need to enter the exact URLs for items that should be purged.
Purging a single file from the CloudFlare cache immediately removes that resource from the CloudFlare cache, and the subsequent request for that resource will re-add the resource to the cache with the latest version served from the origin. It is recommended to use this option if you don’t want to slow down the site: 
Purging the entire cache means all resources in the CloudFlare cache are immediately invalidated, and the subsequent request for each invalidated resource will go back to your origin server(s) in an attempt to re-validate the resource. If the resource can't be re-validated, the resource in the CloudFlare cache will be replaced with the newer version of the resource from your origin. If you have many assets and lots of traffic, those requests can result in a substantial increase in requests to your origin and slow down your website.
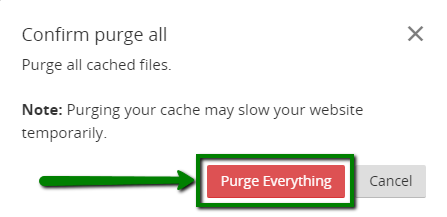
If you’d like to purge all the cache, you would need to press the Purge Everything button and proceed as shown on the following screenshot: 
NOTE: Once the cache is purged, the browser and server will need to re-download it again, and it may take some time. During this period, the load time for purged pages may take slightly longer than before purging.
That's it!
Need any help? Contact our HelpDesk