Composer is a tool for dependency management in PHP. It allows you to declare the libraries your project depends on, and it will manage (install/update) them for you. Composer is not a package manager in the same sense as Yum or Apt are. Yes, it deals with 'packages' or libraries, but it manages them on a per-project basis, installing them in a directory (e.g., vendor) inside your project. By default, it will never install anything globally. Thus, it is a dependency manager.
To install Composer:
1. SSH access should be enabled for your hosting account with us. Contact our hosting support via Live Chat or Ticket system in order to switch SSH access on.
2. To access your account via SSH, download and install one of available SSH clients. You can find the list of free SSH clients here. In case you are using a Unix-based OS (Linux or OSX), you can easily run the Terminal application and connect to the server using the command:
ssh username@servername -p21098
ssh - command for logging into the remote server
username - your cPanel username
servername- name of the server where your hosting account is located (you can find it using this tutorial)
-p21098- port which is used on the shared server
3. Open your SSH client, put your domain name or the IP address of the server into the Host Name field, enter 21098 into the Port field, choose SSH as your connection type and press the Open button:
4. If you receive PuTTY Security Alert, press Yes: 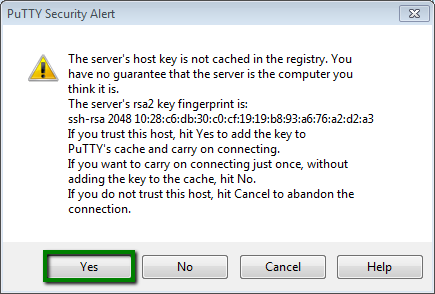
When prompted, enter your cPanel username and password (when you enter the password, it is automatically hidden for security purposes): 
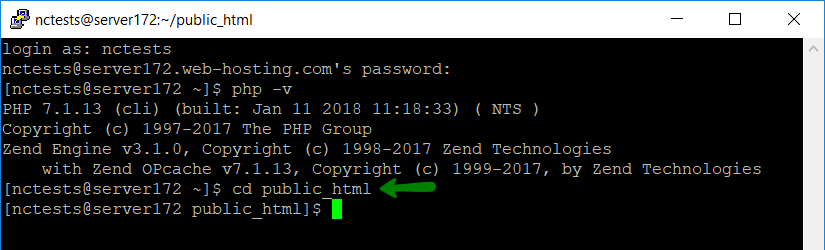
5. Composer requires PHP 5.5+ version, so we need to check whether the needed version is set up. Type the php -v command in PuTTY (or in Terminal) and you will get the following output: 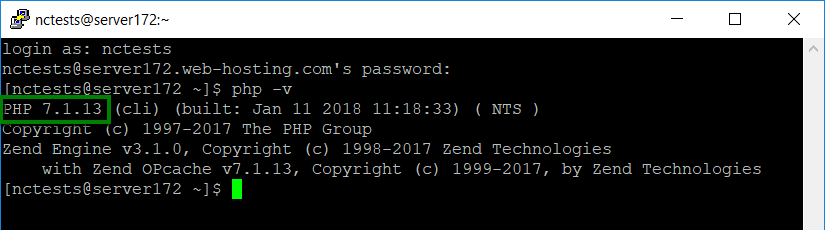
6. If you need to change php version, log in to your cPanel, navigate to Software and Services section > Select PHP Version menu: 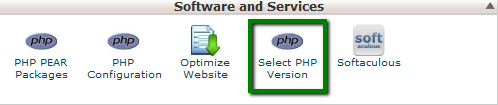
7. Select 5.5-7.2 version from the drop-down menu and then click on the Set as current button: 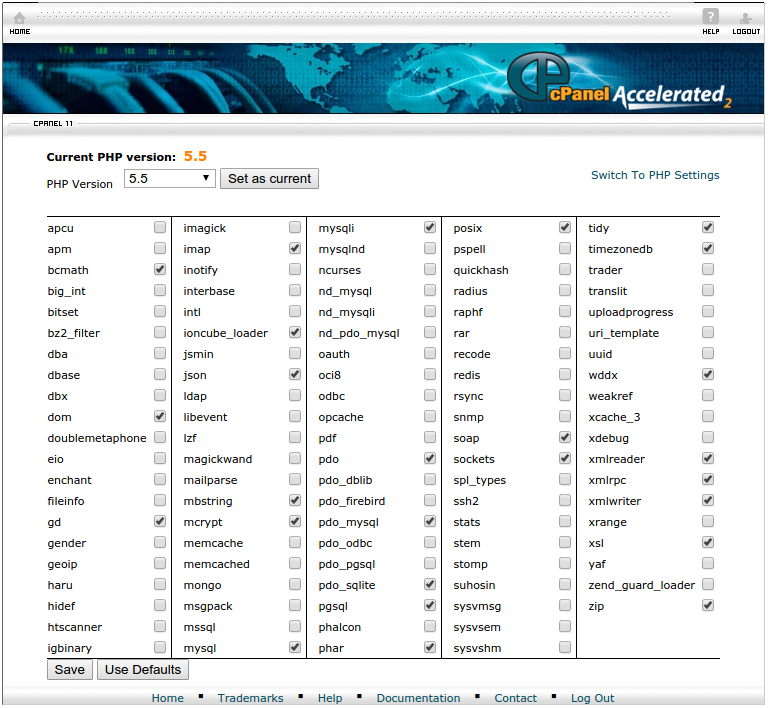
You can also find additional information about PHP selector here.
8. Next, navigate to the folder you want to install Composer in. In our example, we will install Composer in public_html:
cd public_html
9. Now, you will need to find php.ini file and some values to it. Log in to cPanel and navigate File Manager menu:

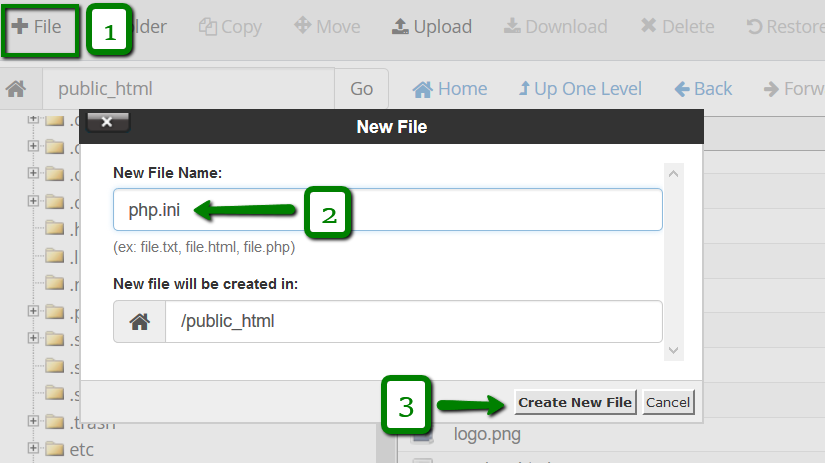
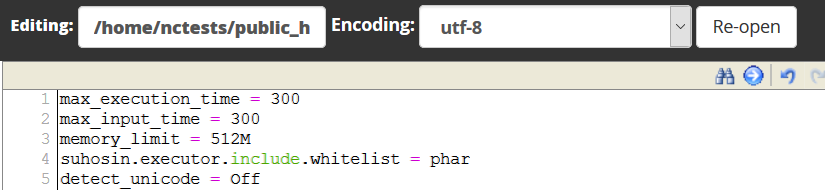
10. Go to the folder your Composer will be installed in and create a new file named php.ini using +File button:
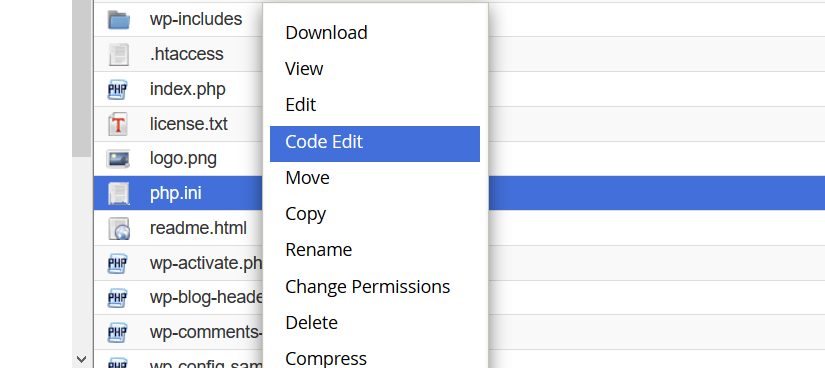
11. Open it by right-clicking the created php.ini file > select Code Edit > Edit:
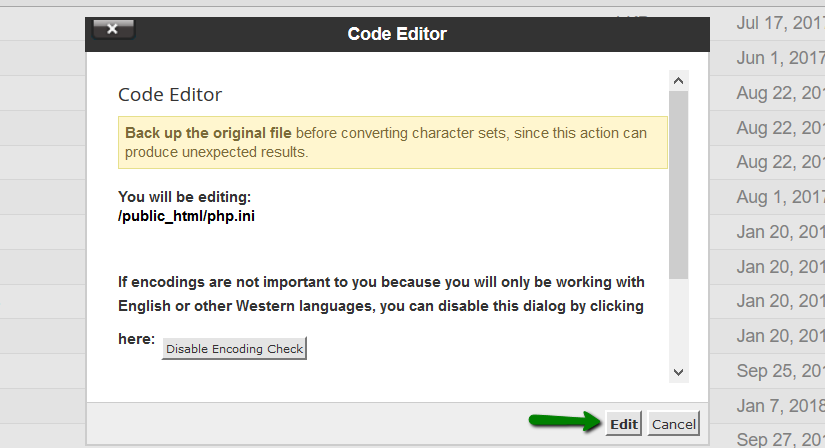
12. Then add the following values to the the file and hit the Save Changes button:
max_execution_time = 300
max_input_time = 300
memory_limit = 512M
suhosin.executor.include.whitelist = phar
detect_unicode = Off
13. When all the preparations are done, you are ready to install Composer. Open PuTTY window where you have logged into your cPanel account and fill in the following command:
php -r "readfile('https://getcomposer.org/installer');" | php -c php.ini
This will execute the Composer installation:
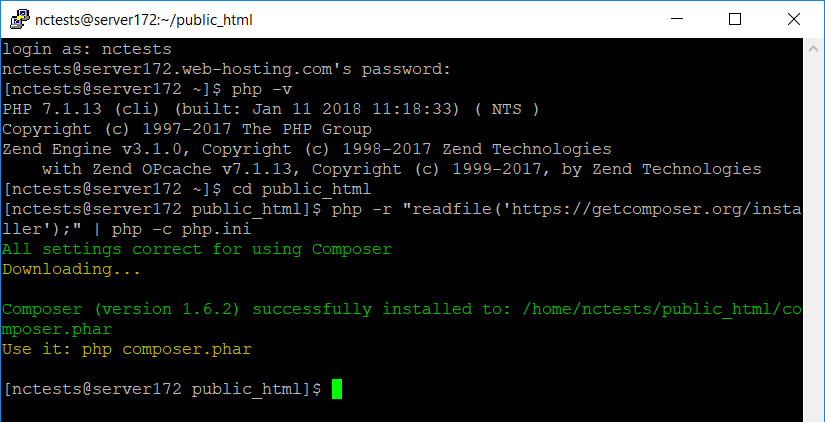
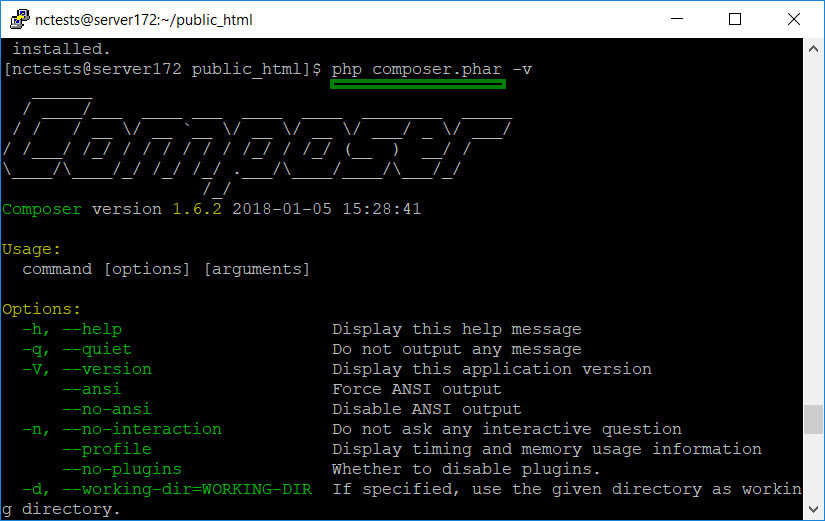
To run composer commands use:php composer.phar
In case you get a notification Some settings on your machine make Composer unable to work properly, make sure that the PHP version is 5.5 or higher and all the changes in the php.ini file are saved.
That's it!