1. Go to the NityGity homepage > click on the Hosting tab
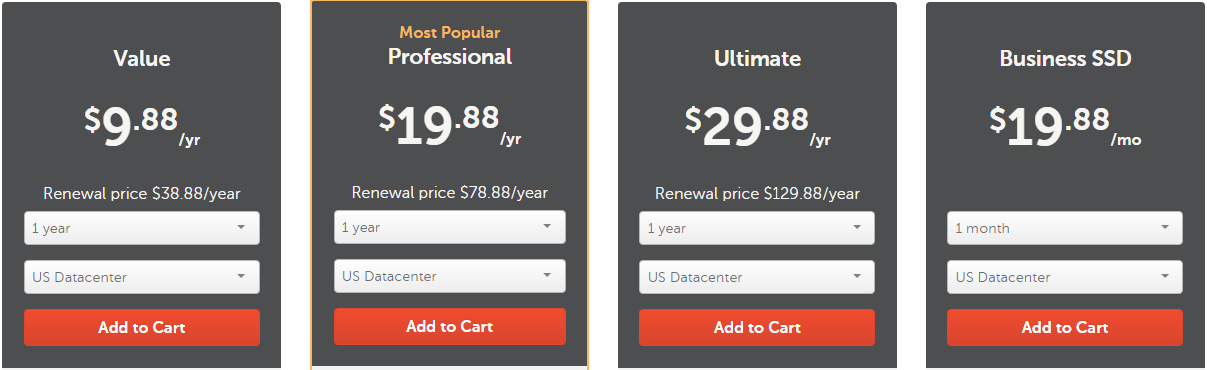
2. Choose the service/package you require
3. Select the length of time you require this package for and location - US or UK datacenter
4. Click on Add to Cart: 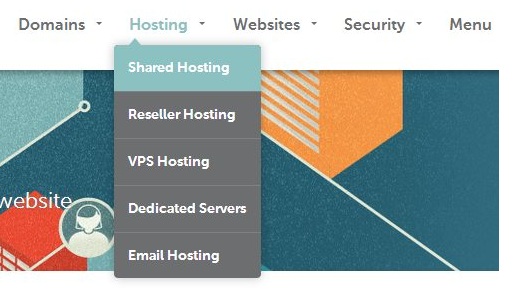
5. Then you will be prompted to choose a domain name for your new hosting package: 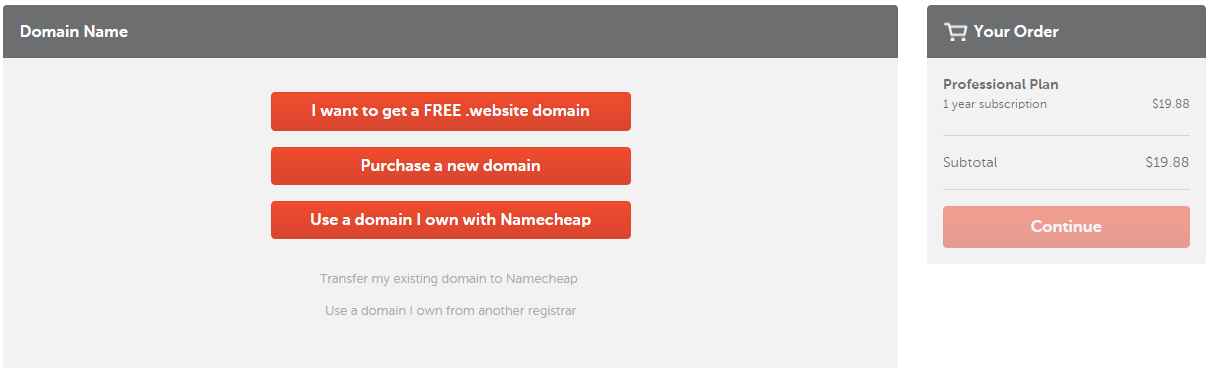
NOTE: If you are purchasing a VPS or dedicated server after completing the step above, you can choose your server’s configuration.
6. On the next step, you can review your order details and apply a coupon if you have one. Click on Confirm Order to proceed to the checkout: 
7. Once done, choose the payment method for your hosting package. You can choose one of three payment methods – Credit Card, Paypal or Account Funds:
8. On the next page, you will see the final order listing and will need to agree to our Terms and Agreements. When ready, click on Pay Now: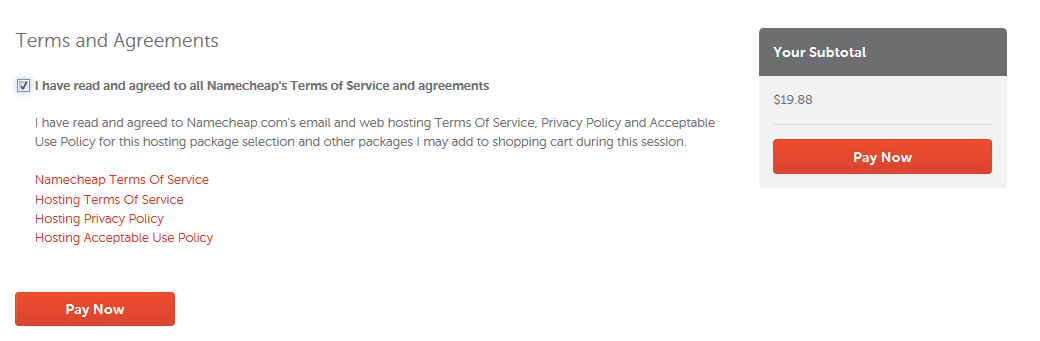
A shared hosting account is usually activated instantly, however, in some cases it might take up to an hour.
Once your account is activated, you will receive your Hosting Welcome Email – it will have all your account’s login details, settings and instructions.
NOTE 1: Before purchasing a new hosting package, make sure that you do not already have a hosting package for the same domain name – this will help you avoid any future confusion.
NOTE 2: If you want to upgrade your current package, submit a ticket to our Billing team.
That's it!
Need any help? Contact our HelpDesk